samedi 6 décembre 2014

Technique transfer: textures and sheer tints

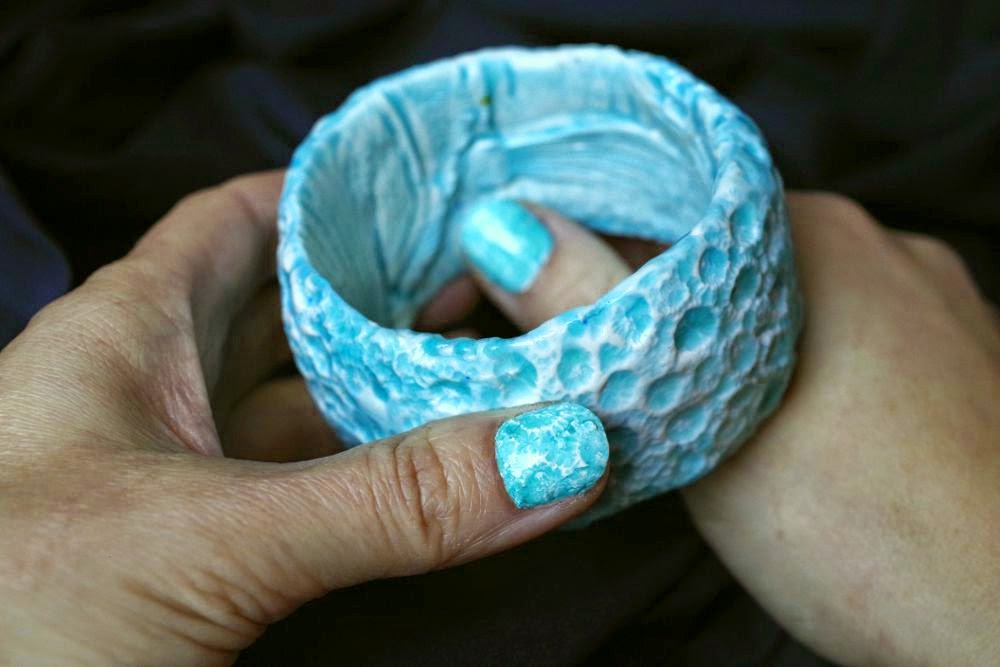
Inside the reef bracelet and assorted nails.
This one is really just an easy derivative of the use of textures.
In polymer clay work, adding translucent tinted layers on textured clay is a well known technique to create faux ceramics. I think that you see where this is going...  This time, I have applied the same approach to a polymer clay bracelet and nail surface treatment (well, the bracelet inspired the nails), which is probably way overboard in matching everything together.

There are many ready translucent colored polishes (from jellies to sheer tints), many recipes for DIY tints like for instance here or here mixing opaque or jelly polish with clear polish or top coat.
I tried to combine several of my jelly polishes with transparent polish, but none of them had quite the right color for a perfect match with the bracelet, so I used the same alcohol inks as for the clay (Pool and Stream from Adirondacks). I let a few drops evaporate completely in a small bottle, added Sèche Vite polish diluant to resuspend the pigments, and then a few drops of transparent top coat (this polish is used in thick layers, so drying fast is important). I would not advise this though, as the inks are not makeup safe, but from what I have seen the one I made was a bit more colored than the OPI tints, for instance.

Basically, you make and install the dimensional polish decals like described here, but using a white or very light colored polish.
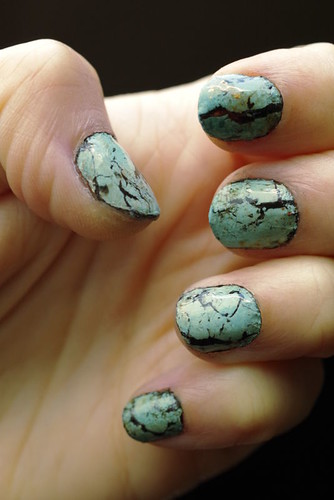
Coral texture on the thumb
You leave to dry thoroughly (the polish is going to be thick enough as it is). And you fill the lower areas of of the texture with the tinted polish, and let gravity do the work. Fast-dry drops were of high help at this stage.
After this layer is solid, either you are happy with how it looks, or you can add more tinted polish or remove some (by stroking it with a sponge with a little polish solvant). When the pattern looks good, you can level the whole with some untinted top coat.
I discovered in the process that it is best not to keep the polish decals too long before use. I made a try on a wheel the next day after making them, and all went fine. But I let two weeks pass between installing them, and they were so rigid they broke in pieces when I curved them around my nails. I saved them by putting a layer of top coat on their back before installing them, as this made them just pliable enough.


Too much going on on the other nails. A pity, the waterspotted was real nice.
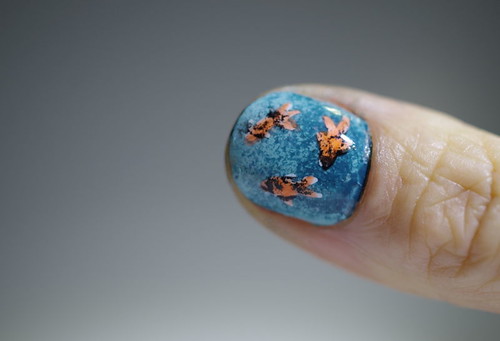
Fish scale texture.
It is also definitely better to pair these with monochrome nails, as a busy pattern (like the two color waterspotted I tried first) just takes the attention from the pattern.

vendredi 31 octobre 2014

Technique transfer: polymer clay as a mold

Late for Halloween, but maybe in time for the release of last of The Hobbit movies, here is a tutorial for a 3D dragon manicure. It is a bit time consuming (especially the polish drying times), but is not difficult in itself. Polymer clay does not dry out, so you can just start over if you are unhappy with the result. The technique can easily be adapted for many other subjects. You will need two component silicone to make the final mold.

samedi 11 octobre 2014

Technique transfer: let there be texture

Bamboo texture from a steam cooking basket

I have a collection of natural textures collected over the years, and most are wonderful on polymer. So I wondered how I could use them in the technique transfer exercise, and here is the results after a few tries.

The approach relies on  self made molds of silicone  (the type you mix out of two components). They are easy to use, have a very high resolution, and most importantly the nail polish does not adhere to them (at least to my brand of silicone, make a test on yours before ruining a precious mold).
If you are interested, here is a tutorial of how to reproduce the effect.

lundi 29 septembre 2014

Technique transfer: transfer technique

One of my first loves in polymer clay techniques was laserjet transfer. It transfers a mundane print to a polymer canvas that can be shaped, engraved, painted and otherwise tortured. As drawing is not my forte, this opened a huge range of possibilities to me, and I still love the approach.
Technique transfer: transfer technique

For nails, I found sites exposing two main approaches, very close to those on polymer: transfer directly on dry polish on the nails using rubbing alcohol as a transfer agent, and home made decals by applying polish to a print on normal paper, and then carefully  rubbing of the paper, leaving the print on the polish (very similarly to what is done on polymer, and with the same drawbacks; it is not easy to rub of the paper and not the print).
Some also use special papers of various kinds like printable decal paper, but I am more interested with what can be done with non-specific material easily available at home.

I had been very lucky with transfers on polymer, because I stumbled very early on a foolproof technique: laserjet printing on parchment/baking paper (I first saw the idea on GlassAttic, and it was proposed by Valerie Aharoni, but her website is now down). If your printer is not wrecked by the paper (you do this at your own risk !), and it comes out without being smudged, perfect and complete transfer is assured, because the parchment paper will not attach to the ink or the clay like regular paper does). Parchment paper is already used in nail art to create pure polish decals with drawings / or stamps easier than directly on nails (a search with stamping decal technique brings up very nice examples and tutorials).

So of course, I had to try to combine the two. Polymer clay lovers will recognize all these steps, the single difference is the use of polish instead of liquid clay.

jeudi 25 septembre 2014

Playing with polymer clay techniques - without polymer clay-

Playing with polymer clay techniques - without polymer clay-I had never considered combining polymer approaches with nail art, because of the treacherous incompatibility on the long term between many nail polish and polymer clay. I don't care much for cutesy cane slices on nails. But then I saw the beautiful false nails Claire Wallis made (found them through an "Other things you might like" link in The Polymer Arts blog), and started to think about what polymer clay could be used for in nail art. I am at best a dabbler in nail art, and I can neither reach Claire Wallis's wonderful precision in caning, nor draw correctly, especially on such a small surface.

But maybe I could use some of the many other techniques available ?

dimanche 21 septembre 2014

Hollow beads using water-soluble child's clay

Among all the uses of playdoh encased in polymer clay, making hollow structures is a very interesting one, although somewhat tricky. There have been many uses of various water-soluble products for this purpose (like sugar for instance), and I am pretty sure others have tried this too.
It is probably not the best material but can come in handy, and allows to make very nice custom shapes.
Plankton beads

samedi 20 septembre 2014

Shell beads

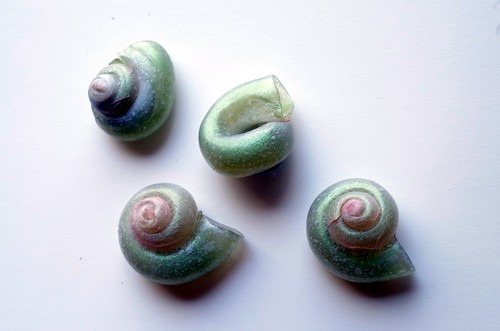
Water-soluble clay lends itself very well to make very easily complex-shaped hollow beads. These shell beads are based on the playdoh cane and completely hollow, although I think some playdoh remains in the inner spires, and give them those nice pink shades.
The bead is basically a bull's eye cane with a fine outer layer of polymer clay and a larger playdoh core that has been rolled into a cone and then unto itself.

Shell beads

The playdoh faux wood cane

This cane is a very easy variation of the playdoh cane, and makes a wood surface with a lot of texture. The texture is naturally aligned with the (faux) wood grain, and is great for all antiquing techniques.
This works great with molds:
Someone forgot her outside for ages...

As a surface texture for faux wood (adapted from the twig tutorial of Randee M. Ketzel)
Firefly and liverworts


The playdoh cane

Two years back, I experimented a lot during the fantastic "Becoming a better artist" course of Christine Dumont on Voila!. One of these had a huge potential, and many applications: the playdoh cane.
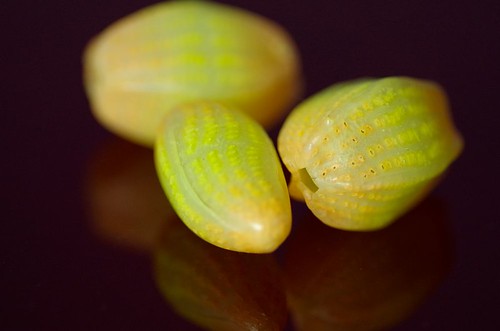
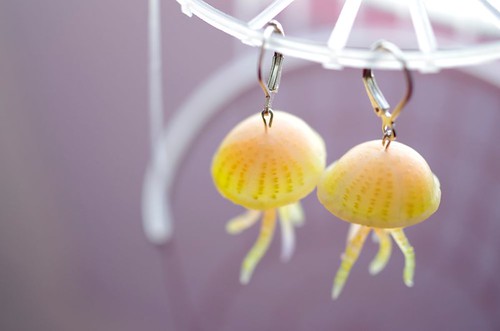
These jellyfish have pinhole sized-holes all around:

Pastel jellyfish

This is a variation of the Stroppel cane. The internal walls are about half a millimeter thick:
Stroppel cane variation

Starting again ?

After forever, a reboot of this blog...

I had been relatively active in between here.
Corrosion

I can't promise this will be regular, or anything, but I want to group older and new polymer work and tutorials under a more cohesive (and more easily findable) structure than my photo streams. Hope it will be of help...

Je n'ai pas trop le temps de tout faire en bilingue français-anglais, mais s'il y a assez de demandes, je m'y mettrais...