 |
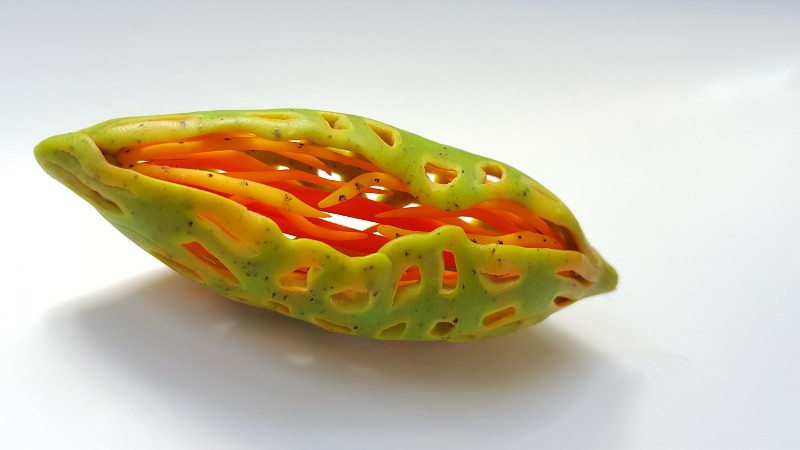
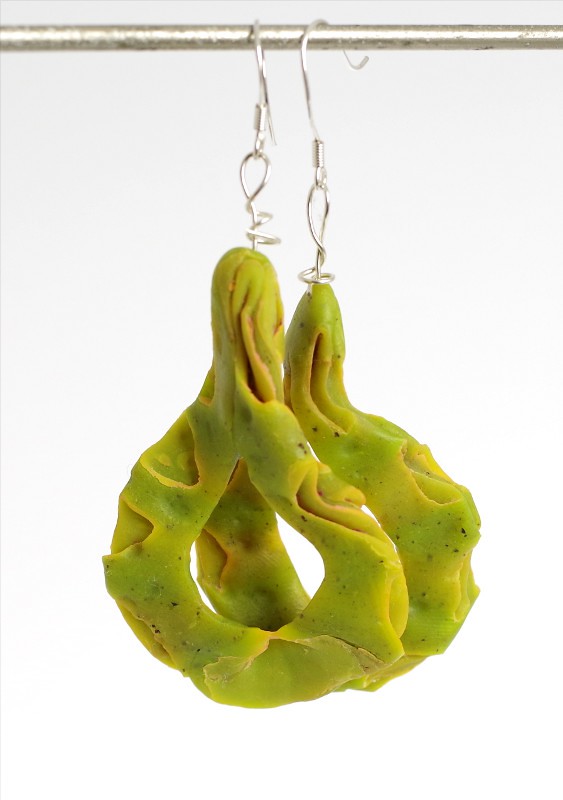
| Single bake complex pod with paint dot tests. Picture by M. Medenica |
I hope this can offer new
leads. It is not a tutorial per se, but I tried to describe enough of
the technique for others to reproduce, do their own tests and
hopefully build on it. All the presented pieces are proof of concept
and could be considerably ameliorated, but as those who saw them at
Eurosynergy 2 can tell, they withstand manipulation and transport
well.
A word of caution: while
my tests did not show any problem with baking the water soluble clay
(abbreviated in WSC from here onward) at the temperatures used to
bake polymer clay, I do advise caution when using this technique, to
avoid any fire hazard. I did not try the Kato
clay, but Fimo, Pardo and Premo all worked fine for me at the normal
baking temperatures and slightly above. Use at your own peril.
The technique builds
directly on the work started in 2012 on playdoh canes (negative spaces in canes, stained glass effects...), but trying to
push it further. As usual, I got lost in the technical experimenting
and went into multiple different directions.
I set myself two rules:
- Using the playdoh as a
resist for an organic work with negative spaces
- Only a single bake for
all the layers at once
The single bake was
initially to keep with the 90 min restriction of the challenge, but
it proved very interesting to work around (or with).
First some pointers and caveats :
Brand of water soluble
clay
I use playdoh modelling
clay because it is easy to find (I stole it in my own child's room, bad mother that I am), not too expensive, very soft and fine, and it dries but does not bake in the oven. It is quite probable that other water
soluble and children modelling clays (including home made) would do
just as well, and might offer interesting alternatives for price, softness, etc.
Softness of the water
soluble clay
Playdoh is softer than
most polymer clays (I have yet to try with Sculpey ultralight, but
all the others are harder).
Reduction when caning will always flatten
more the playdoh part than the rest of the cane, and some will come
out at the ends. So it works better in combination with softer clays
for caning, to limit the difference between the components. When
creating a cane for reduction, a very soft polymer clay like Cernit
or Pardo works best. I have obtained reductions where the openings
are reduced to pinholes with both of these (like the plankton beads).
If the cane does not need to be reduced, harder clays can be used.
Precision work is difficult, and the cane gets easily deformed when
cutting the slices.
The softness is an
advantage when using it as a resist, as it will not distort textured
surfaces (except if pressed strongly on them, but why would you want
to do that ?).
For projects where the WSC
is only used as a support, harder clays might be a better choice, but
it is also great to help very soft clays remain standing in the oven.
Shaping
The WSC can be shaped by
hand, but also using the pasta machine, the clay gun or other tools.
The tools should be cleaned rapidly to avoid small pieces to dry and
contaminate further polymer projects. Wet paper towels or baby wipes
are great for this.
Drying
Playdoh is water soluble,
and dries when exposed to air and in the oven. It shrinks when
drying, and larger surfaces crack.
Canes containing WSC are
best used when fresh, because it becomes difficult to cut them
reliably when some parts are dry. Plasticisers can also leach in the
dry playdoh after a while. It is possible to keep canes from drying
for a while by packing them carefully in plastic, but changes in
texture occur after a while.
It should be possible to
use dried shapes from playdoh, after carefully checking for cracks.
It is also possible to fill the cracks with fresh playdoh, but the
process might have to be repeated before obtaining a relatively
smooth surface.
Combining playdoh with
other support material is quite possible too. It is very good as a
coating to protect the polymer surface against rougher fill materials like
crumpled paper or aluminium.
Baking
The water soluble clay
buffers the internal parts from the baking temperatures, but it also
takes longer to heat correctly. I recommend longer baking times to
ensure baking to the core (2-3 times the standard recommended time). Small amounts of WSC dry completely during the baking. Larger amounts used as a core are generally dry on the surface, but remain malleable inside.
I use slightly higher
temperatures than recommended by the manufacturers, as has been established by many polymer artists. I will give the
baking time and rough size for each piece presented as an indication.
Removal of the water
soluble clay
All it takes is immersing
the baked piece in water and waiting. It might however take
considerable time when dealing with larger amounts of WSC, so
minimisation of the amount of WSC used and manual removal of as much
as possible are good options to accelerate the process.

Dissolving starts at the
surface, and as the layers are removed the deeper parts of the WSC
absorb more water and start to disintegrate. If you provide more
surface for the water (by scratching the WSC for instance), or access
to the heart of the playdoh, you will be able to remove it faster.
You can do this by poking holes in it, integrating a rough piece of
thread that you pull out before immersing (leaving a conduit for the
water where it used to be). You can also, depending on how your
structure is constructed, just pull out chunks of softened playdoh
using a tool.
A directed water spray (under the tap for instance)
also speeds up things considerably, but it can still take days of
intermittent cleaning and immersion for complex pieces with little
access.
I noticed no difference
between hot and cold water as for the efficiency, but I did not make
systematic tests.
The recovered chunks of WSC can be dried
slightly and reused in another project after mixing. However a lot of
the playdoh will be washed out and lost.
Surface
The WSC will leaves a matte finish, and on Premo needs to be slightly polished on surfaces.
I have not tried with Kato
though.
Color transfer
I have been repeatedly
asked whether the color of the WSC is important. The large playdoh color packs generally contain bright colors, but there are also some light neutrals (very light yellow, cream) and white available.
I had fuschia playdoh give
translucent pardo (here and here) a pink tinge, and also to white
Fimo classic (here). I had no problems with
Cernit and Premo, however the projects included no white or untinted
translucent. I now try to use playdoh colors closer to the clay color, but I used purple for the pods with no ill effect.
Resists where you don't
need them
As long as the WSC is
there, it binds the pieces of polymer clay together. Once it is
removed, they can separate if they are not solidly linked to each
other. This is why the playdoh wood cane needs a backing, and any
project containing large amounts of playdoh might be less sound
structurally, unless great care is taken in the polymer clay-polymer
clay connections. As the water soluble clay is very soft, some can be
dragged by the blade when cutting playdoh canes, and prevent the
slice from adhering on the backing as there is a fine layer of WSC
between the two. This can be avoided by being careful, checking the
cleanness of the slices, and using liquid clay.
Now on to some applications and examples.
Clay layers metamorphism
A stack cane alternating
polymer and WSC can be used to create surfaces covered with lamellar
structures separated by spaces. These can be deformed at will, as the
water soluble clay layers prevents the lamellar polymer clay
structures from touching each other, acting like a resist.
 |
| The stack with pression tests. The WSC gets spread and pushed out, and the deformation does not get to the core. Materials layering and resistance 101. |
The WSC is
softer than the polymer, so it will deform more, and deformation
patterns will not reach the center of a thicker stack. Reduction of
the stack is possible, but will be limited, as the WSC is easily
pushed out. Assembling it with fine sheets of soft polymer is the
best option.
 |
| After assembly. Not much to see. |
 |
One of the simple organic canes: one layer green WSC (created here unwisely aligning extruded threads; the pasta machine is much more efficient) on one layer of clay (here with one gold side and one black side), coiled on itself.
|
This was one of the first tests, and I did not pay
enough attention to WSC remaining below the slices, so some parts
were insufficiently in contact with the clay base and broke when
manipulated. However most of them are quite strong despite this.
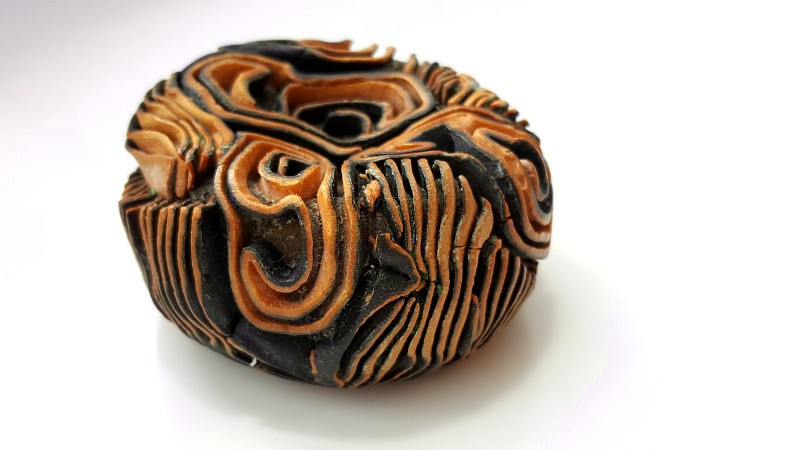 |
| Premo, 2h bake. Organic side. Some parts of the pattern decided to get away. Picture by M. Medenica |
 |
| Definitely needs more cleaning of the playdoh. Picture by M. Medenica |
 |
| Lots of broken parts, but it is possible to assemble bull's eye cane with polymer inside and WSC outside to obtain regular spacing. The lined part was assembled from six slices from the same distorded stack cane. 2 hour bake, Premo. |
Premo on a premo base and
a light core, 2 hour bake. The straight lines were pushed and moved
slightly to make an undulating surface.
Twisted ropes and braids
Polymer clay strands have
long been twisted, braided, and otherwise associated to create more
complex structures. It is possible to replace one or several of the
strands by a rolled or extruded playdoh strand. The presence of a
strand when braiding/twisting prevents flattening and helps
considerably with regularity. When it is removed, it reveals the
remaining regularly spaced and undulating polymer clay strands.
As the WSC is very soft,
it is sometimes difficult to work with long, fine strands. However
additional pieces can easily be added to make a longer piece as
needed. As the WSC is removed afterwards, the only thing to pay
attention to is the regularity at the junction. The softness of the
WSC has another advantage: textured strands will be protected even as
they are twisted.
These are all one hour bakes, with different clay brands.
It is also possible to dispose around a clay core and twist:
These are all one hour bakes, with different clay brands.
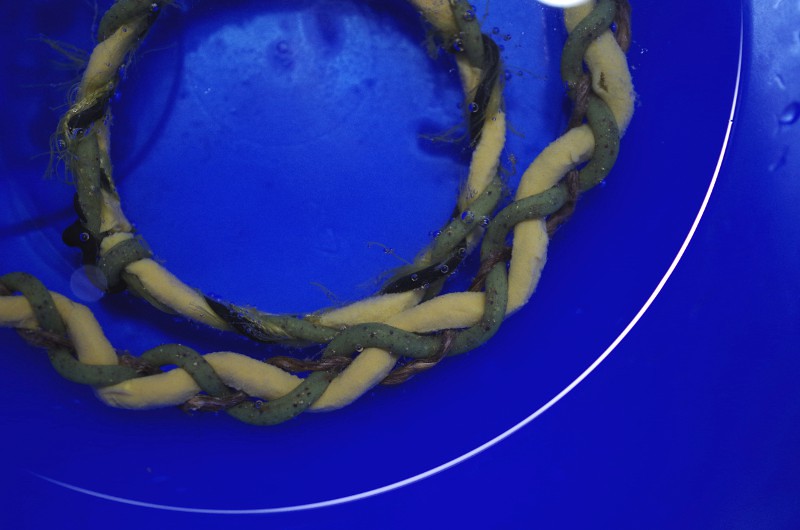 |
| Braid tests immersed after baking. The large one is hemp, WSC, and Cernit. It withstood pretty rough treatment at EuroSynergy. |
 |
| Three strand braid using tinted Pardo translucent. One larger clay strand, two finer clay strands manipulated as one, and one WSC strand. I made the error of using a soda can as a support, and the WSC could not shrink as it wanted and broke the clay. |
 |
| Three strand braid (one WSC, one black clay with knitting hairy thread, and one green clay). Cernit. |
 |
| Extruded square WSC core, flattened textured Pardo on both sides. Assembled straight, and then twisted and closed. The WSC protected the inside texture and gold powder. |
 |
| The extruded earrings before baking. Wrapping with extruded strands is not the best or easiest way. |
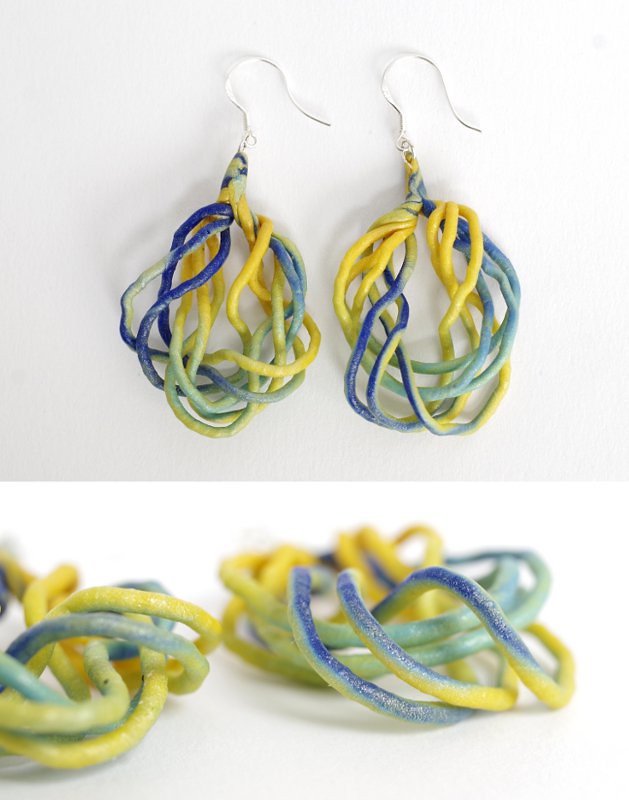 |
| Premo. 30 min bake. Top from the front, bottom from the side. |
Structures within structures, in a single bake
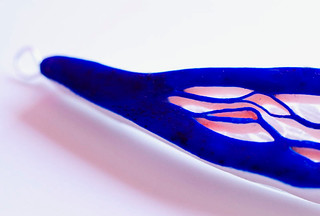
I had made some tests with the external part of these pods. These are simple bull's eye canes arranged in two lines, the cane is then shaped like an ellipse and cut. The slices are arranged around an elliptical WSC core, assembled at the ends and twisted or shaped for a more dynamical shape.
I then tried shapes within a protective but see-through external shell. The idea came from the floral diagrams used in botanical studies, so I started by a flower.
These are very hard to photograph, and I want to thank Martina Medenica who took the time to help me by making the pictures, and especially that of the red flower (and just in time, as I managed to break one of the petals the next day).
Just start in the middle, and build from there. Decide the shape and color of the center, prepare it, and wrap it with playdoh leaving the end(s) free for contact with the other polymer components.
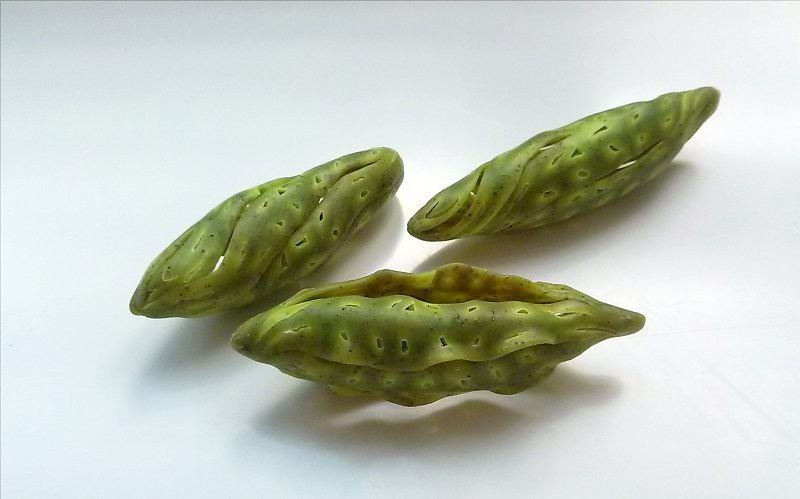 |
| Pod tests. |
These are very hard to photograph, and I want to thank Martina Medenica who took the time to help me by making the pictures, and especially that of the red flower (and just in time, as I managed to break one of the petals the next day).
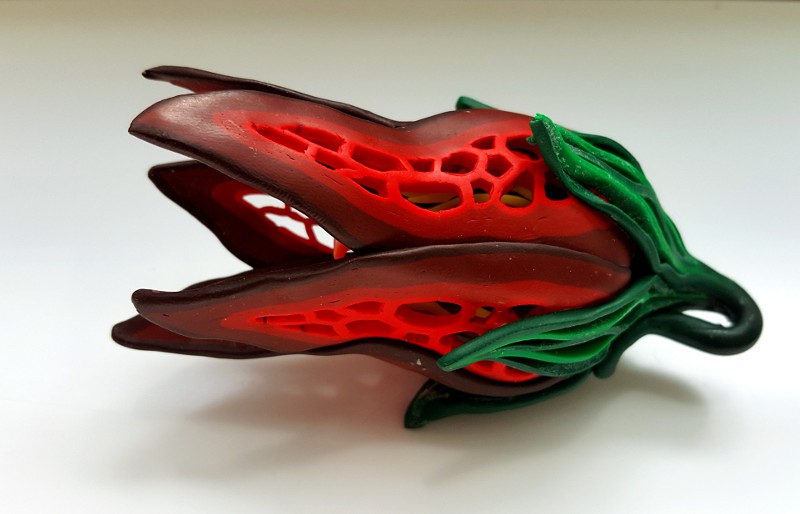 |
| Premo, four hour single bake. Picture by M. Medenica. |
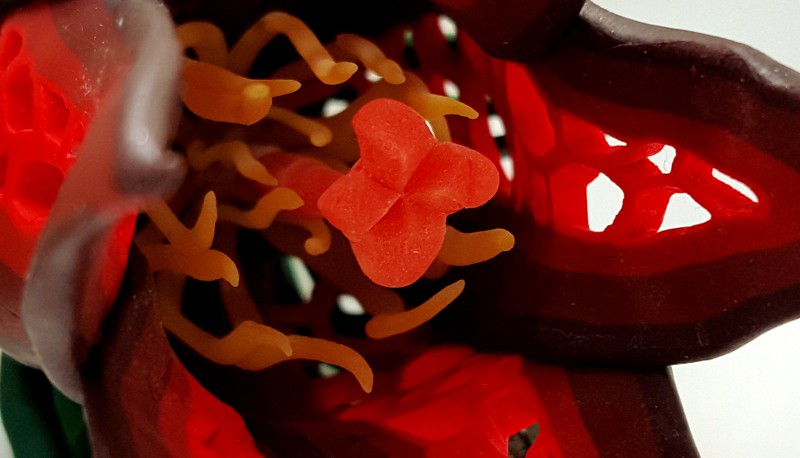 |
| The inside of the flower. Premo seems more modified in surface by the WSC. Picture by M. Medenica. |
 |
| I got wiser and used sheets of WSC this time. Cernit |
 |
| Wiggly stamen thingies |
Wrap again in WSC to separate the layers. Repeat these steps as many times as needed.
Add an external layer you can see the inside through. This layer can be twisted and shaped, the WSC buffers the inside.
 |
| Before the sepals |
Bake once, but long enough for the internal parts to be baked properly. I used 2h for the Cernit pods.<2cm 4="" 5="" and="" around="" cm="" flower="" for="" p="" premo="" that="" the="" wide.="" wide="">
 |
| The WSC contracted and cracked after baking. So did the sepals in places, because there was not enough clay-clay contact |
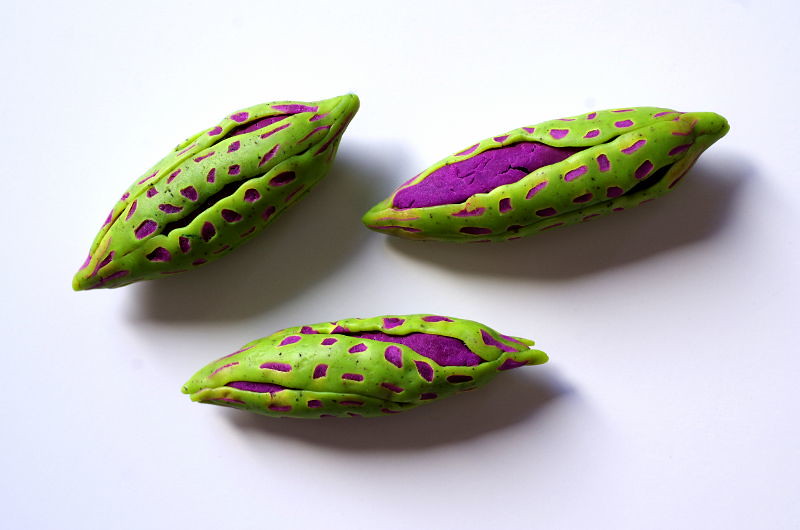 |
| Pods after baking |
 |
| And after baking and removing the playdoh. The pod is attached on the hemp and polymer braid. |
Reusing the scraps
The water soluble clay
adheres to the polymer clay, so it is difficult to remove once in
contact. Completely mixed together, they are structurally weak. But
the scraps containing bits of water soluble clay can still be used,
at several levels of transformation. It might be worth to remove a
bit of the playdoh (or add pure polymer clay pieces) to make a more
cohesive material if the ratio is too high.
These are all small, normal bake time projects.
These are all small, normal bake time projects.
- Cut into small pieces to
create wood canes.
- Pressed and twisted to
create interesting textures.
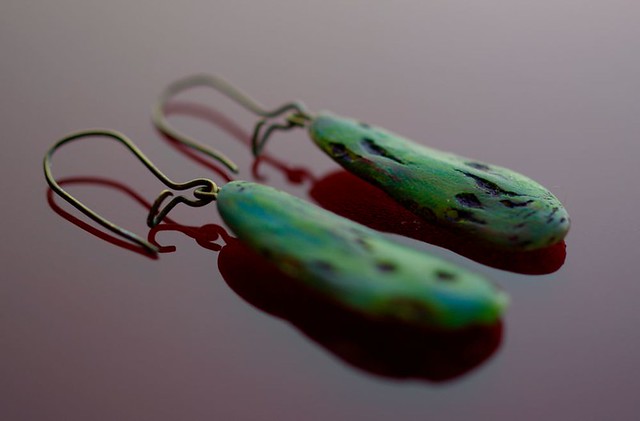 |
| Recycled rests from the plankton beads. Pardo. |
These are deformed cane ends from the
outside « leaves » of the pods.
- Mixed partially. This
corresponds to the color swirls stage when mixing polymer clay.
 |
| Simple shaped cane ends. Cernit. |
The proportion of
the two components makes the difference between creating interesting
surface effects with still a strong core, and having the piece come
appart because the polymer clay parts are not in contact with each
other anymore. The lime green pieces has approximatively 1/8h
of playdoh to polymer clay, and they are quite strong but very textured. The forest
green piece has half half, and pieces detach from them when
scratching. Adjusting the proportions approximatively removing one
component or adding of the other is especially interesting in this case. The swirls can then take crayon, paint etc differentially, like any texture surface.


Water soluble clay as resist and support for large and fine structures
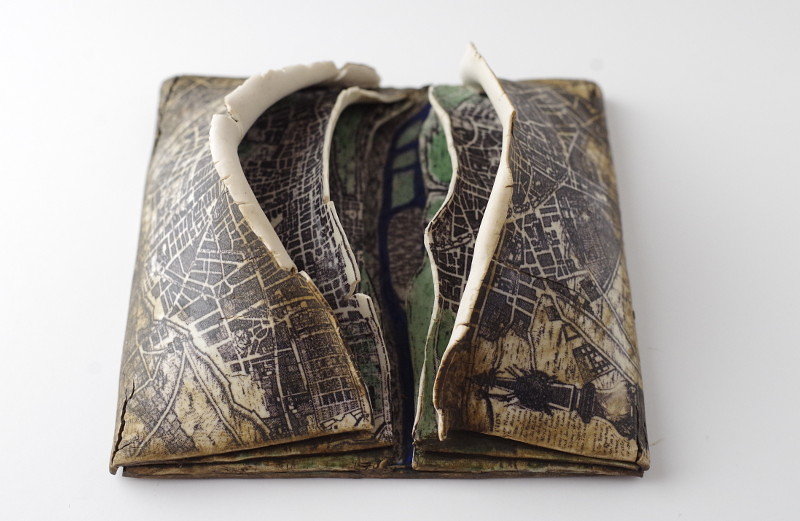
For my tile for the Fimo
50 years auction, I had a series of ancient Paris maps transferred on
relatively fine sheets of Fimo clay, and wanted to have them ripping
and opening in the middle. They needed some support, but the transfer
and unbaked sheets surface were quite fragile. I simply buildt a
support/separation between each layer of map, starting from the
bottom and working upwards layer by layer, using a large piece of
water soluble clay of the right shape as a separation. This was a two bake project, as there is a transfer on the back too.
 |
| Covering the 1000-something map with the support for the next layer. 3h bake project. |
I protected the raw
transfers with acrylic medium before adding the water soluble clay to
avoid smudging. This worked, although the brand I used reabsorbed
water after baking and went white during the immersion. It dried
clear again afterwards, and no damage was done to the transfer from
the layering.
In this case, it was
possible to remove and recover large amounts of playdoh as it was in
only a few blocks and easily accessible.